
แพ็กเกจอย่างเป็นทางการ · เฟรมเวิร์ก
Live Chat และเรียลไทม์สำหรับ Astro
อินทิเกรชันของ Astro: เพิ่มบรรทัดเดียวใน astro.config ทุกหน้าก็มี Hibira Live Chat และสคริปต์ในหน้าได้รับอีเวนต์ presence และคำตอบ LLM แบบสตรีมผ่านการเชื่อมต่อเดียวที่ใช้ร่วมกัน รองรับ Astro 4 ถึง 7


วิธีที่เร็วที่สุด: ปลั๊กอิน Hibira กับพรอมต์เดียว
ติดตั้งปลั๊กอินในเอเจนต์เขียนโค้ด AI ของคุณแล้ววางพรอมต์ เอเจนต์จะลงชื่อเข้าใช้ สร้างแอปฟรีหากจำเป็น เขียนโค้ด และส่งอีเวนต์ทดสอบให้ GitHub ↗
ติดตั้งปลั๊กอิน
claude plugin marketplace add hibira-io/agent-plugin
claude plugin install hibira@hibira
วางพรอมต์นี้
Add Hibira Astro (@hibira-io/astro) to this project.
Follow https://hibira.io/guides/astro, adapted to how this project is already set up.
If I have no Hibira app yet, create a Free one that allows http://localhost so I can test right away.
Keep the app key and secret in environment variables, add placeholders to .env.example, and never commit real values or send the secret to a browser.
When you are done, send a test event, show me it arriving, and list the files you changed.
อยากทำเองใช่ไหม ขั้นตอนด้านล่างมีดังนี้:
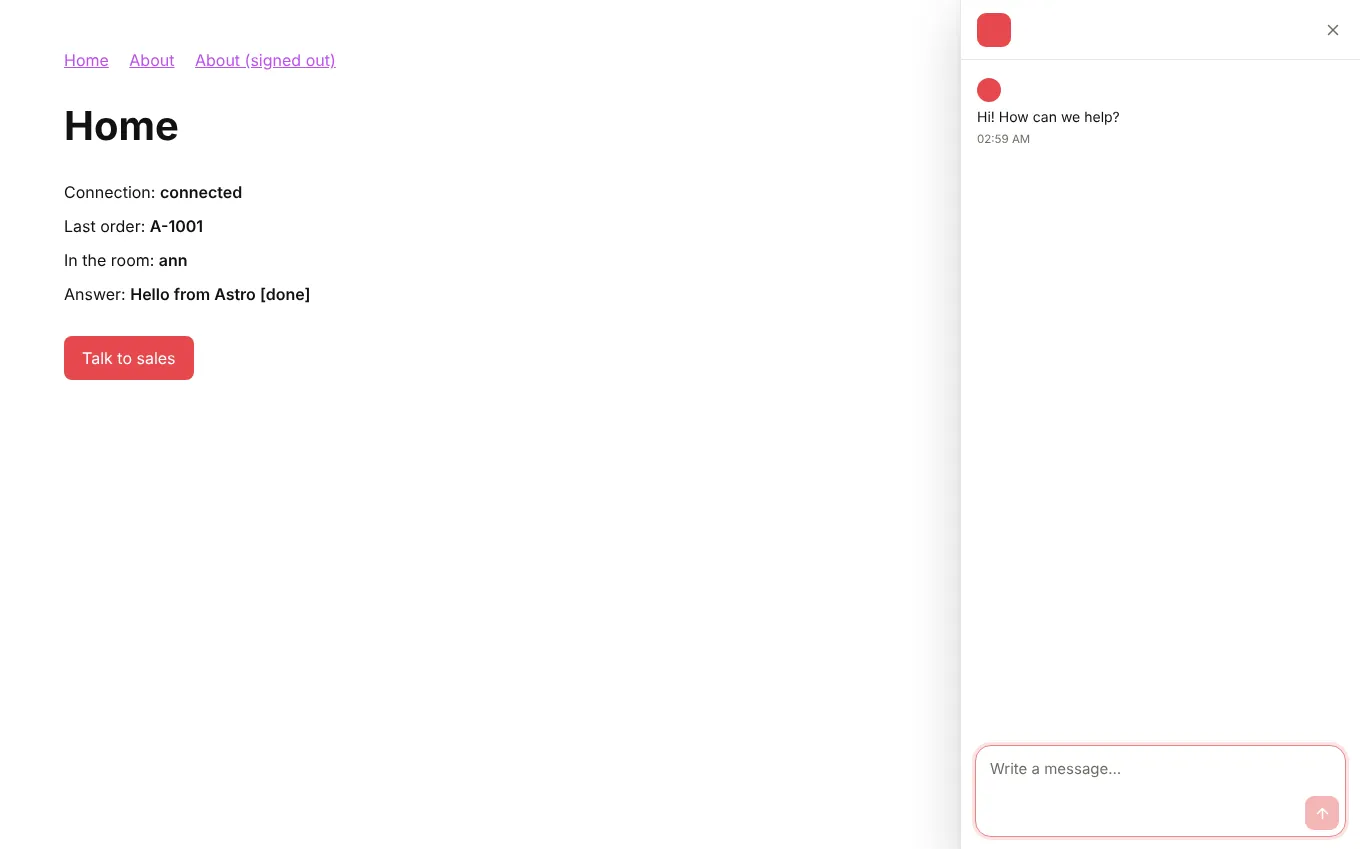
- แชทโหลดครั้งเดียวและยังเปิดอยู่ระหว่าง view transitions ส่วน <LiveChatButton> และลิงก์ไปที่ #hibira-live-chat ใช้เปิดแชทได้
- <LiveChatUser> ลงชื่อเข้าใช้ให้ผู้เข้าชมบนเซิร์ฟเวอร์ด้วยรหัสลับระบุตัวตนของคุณ กล่องข้อความจึงแสดงว่าเป็นใคร และบทสนทนาตามไปทุกอุปกรณ์
- ใช้ onEvent, onPresence และ onStream ใน <script> หรือ island ใดก็ได้ ใช้ channelAuth() เป็น API route และ streamToChannel() สำหรับคำตอบจาก LLM
ลงชื่อเข้าใช้เพื่อดูโค้ดตัวอย่างเหล่านี้พร้อมโฮสต์คลัสเตอร์ของคุณเอง ลงชื่อเข้าใช้
ติดตั้ง
npx astro add @hibira-io/astro
npm install pusher-js
ตั้งค่า
// astro.config.mjs
import { defineConfig } from 'astro/config';
import hibira from '@hibira-io/astro';

export default defineConfig({
  integrations: [
    hibira({
      liveChat: 'ws_YOUR_WORKSPACE', // or PUBLIC_HIBIRA_LIVECHAT_WORKSPACE
      realtime: {
        key: import.meta.env.PUBLIC_HIBIRA_KEY,
        options: {
          wsHost: 'ws.hibira.io',
          channelAuthorization: { endpoint: '/api/hibira/auth', transport: 'ajax' },
        },
      },
    }),
  ],
});
ใช้งาน
---
import { LiveChatUser, LiveChatButton } from '@hibira-io/astro/components';
const user = Astro.locals.user;
---
<LiveChatUser user={user && { id: user.id, name: user.name, email: user.email }} />
<LiveChatButton topic="sales">Talk to sales</LiveChatButton>
<p><span id="online">0</span> online</p>

<script>
  import { onEvent, onPresence } from '@hibira-io/astro/realtime';

  onEvent('orders', 'order.created', (order) => console.log(order));
  onPresence('presence-dashboard', ({ count }) => (document.getElementById('online').textContent = String(count)));
</script>
ก่อนเริ่ม
- ดู workspace ID ในคอนโซล Live Chat และสร้างรหัสลับระบุตัวตนในการตั้งค่า > ผู้เข้าชมที่ยืนยันแล้ว ใส่ไว้ใน HIBIRA_LIVECHAT_IDENTITY_SECRET ซึ่งอยู่บนเซิร์ฟเวอร์ของคุณเท่านั้น
- ในแพ็กเกจ Free ให้ใส่ทุก origin ที่หน้าเว็บโหลดมาใน Origin ที่อนุญาตของแอป (http://localhost:3000 ระหว่างพัฒนา แล้วตามด้วยโดเมนของคุณ) ส่วน "*" ต้องใช้แพ็กเกจแบบชำระเงิน
- แชนเนล private และ presence ต้องมี auth endpoint บนแบ็กเอนด์ที่ลงนามการสมัครรับด้วยซีเคร็ตของแอป เหมือนกับ pusher-js
- ถ้าใช้ Astro 5.14 ขึ้นไปหลังพร็อกซี ให้ใส่โดเมนใน security.allowedDomains ไม่เช่นนั้น Astro จะปฏิเสธคำขอยืนยันสิทธิ์ด้วย 403
ใช้ app key จากแดชบอร์ดของคุณ ส่วน secret ให้เก็บไว้บนเซิร์ฟเวอร์เท่านั้น ช่อง อีเวนต์ และ endpoint การยืนยันสิทธิ์ทำงานเหมือนกับที่ใช้กับ Pusher ทุกประการ สร้างบัญชีฟรีของคุณ →