
공식 패키지 · 실시간 구성 요소
Yjs로 공동 편집
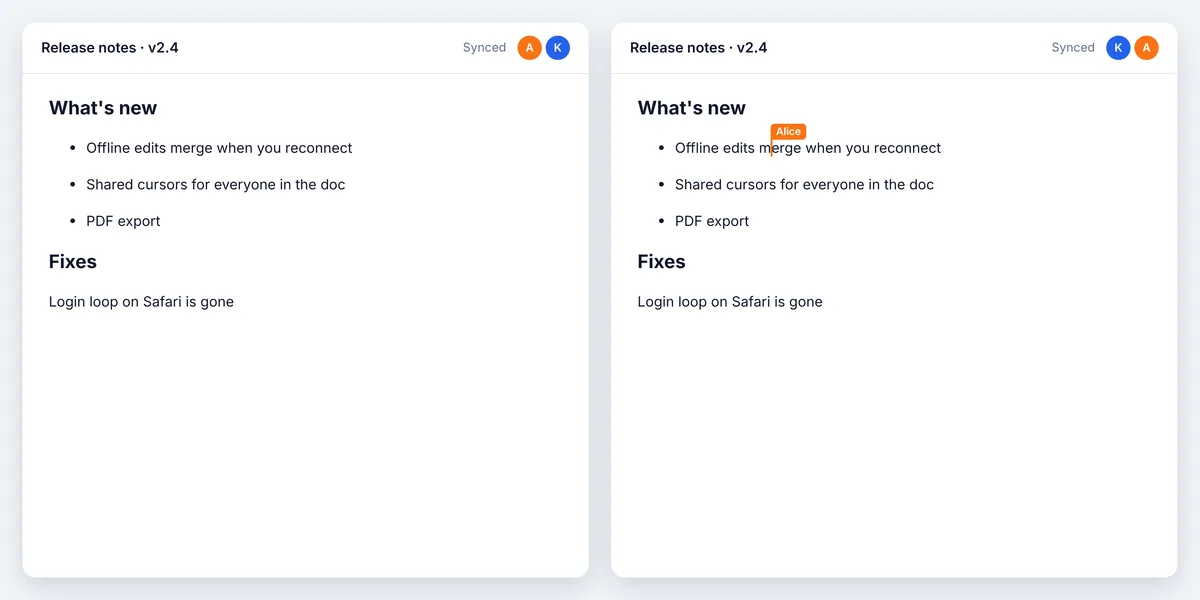
Yjs 프로바이더: 공유 문서와 실시간 커서가 private 또는 presence 채널로 오가므로, Tiptap, BlockNote, ProseMirror, CodeMirror, Monaco, Quill을 y-websocket 서버 없이 쓸 수 있습니다.


가장 빠른 방법: Hibira 플러그인과 프롬프트 하나
AI 코딩 에이전트에 플러그인을 설치하고 프롬프트를 붙여 넣으세요. 에이전트가 로그인하고, 필요하면 무료 앱을 만들고, 코드를 작성한 뒤 테스트 이벤트를 보냅니다. GitHub ↗
플러그인 설치
claude plugin marketplace add hibira-io/agent-plugin
claude plugin install hibira@hibira
이 프롬프트 붙여 넣기
Add Hibira Yjs (y-hibira) to this project.
Follow https://hibira.io/guides/y-hibira, adapted to how this project is already set up.
If I have no Hibira app yet, create a Free one that allows http://localhost so I can test right away.
Keep the app key and secret in environment variables, add placeholders to .env.example, and never commit real values or send the secret to a browser.
When you are done, send a test event, show me it arriving, and list the files you changed.
- 각 클라이언트가 client events로 서로 동기화하고, 오프라인에서 한 편집은 다시 연결되면 병합됩니다.
- 이름, 커서, 선택 영역을 awareness로 공유하며, presence 채널에서는 연결이 끊긴 멤버가 바로 사라집니다.
- pusher-js 또는 Laravel Echo 채널과 함께 쓰며, 전송 속도 제한과 큰 업데이트 분할을 지원합니다.
로그인하면 예제 코드에 내 클러스터 호스트가 채워집니다. 로그인
설치
npm install y-hibira yjs pusher-js사용하기
import * as Y from 'yjs';
import Pusher from 'pusher-js';
import { HibiraProvider } from 'y-hibira';

const pusher = new Pusher('YOUR_APP_KEY', {
  cluster: 'hkg',
  wsHost: 'ws.hibira.io',
  channelAuthorization: { endpoint: '/broadcasting/auth' },
});

const doc = new Y.Doc();
const provider = new HibiraProvider(pusher, 'presence-doc-42', doc);
provider.awareness.setLocalStateField('user', { name: 'Alice', color: '#f97316' });
// Tiptap: Collaboration.configure({ document: doc }) and CollaborationCaret.configure({ provider })
시작하기 전에
- 앱 설정에서 Allow client events를 켜세요. 문서 업데이트는 client events로 주고받습니다.
- 프라이빗 채널과 프레즌스 채널에는 pusher-js와 마찬가지로, 앱 시크릿으로 구독에 서명하는 인증 엔드포인트가 백엔드에 필요합니다.
- 서버는 업데이트를 전달만 하고 저장하지 않습니다. 문서는 직접 저장하고(Y.encodeStateAsUpdate) 연결하기 전에 불러오세요.
대시보드의 앱 키를 사용하세요. 시크릿은 서버에만 둡니다. 채널, 이벤트, 인가 엔드포인트는 Pusher와 똑같이 동작합니다. 무료 계정 만들기 →